Control Burrowing Rodents
By Heather Smith Thomas
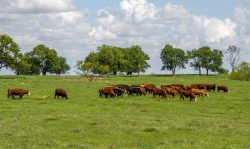
Burrowing animals, ground squirrels, voles, gophers, rock chucks, badger, can damage a pasture and pose a risk for livestock if they step in deep holes. There are many ways to get rid of these pests, according to Sarah Baker, Custer County (Challis, Idaho), University of Idaho Extension Educator. Forage loss in a field or pasture from gophers and/or voles may be as much as10 to 50%. In a hayfield, mounds left by gophers can dull the blades on cutting machinery, and dirt can end up in hay bales. Rodent tunnels may interfere with flood irrigation; the water disappears down a hole, skips an area and pops up somewhere else in the field.
“When I get calls about burrowing rodents, the first thing I ask is what animal they are dealing with. Eradication methods will differ, so we need to know if it’s pocket gophers, voles or ground squirrels. Many people confuse pocket gophers with ground squirrels, so they need to identify the animals,” Baker says.
“Ground squirrels’ activity is often above ground. They make larger holes, which can be very detrimental. Since they feed above ground, control measures are focused more above ground. Pocket gophers tend to stay underground, with extensive burrow systems. All our control measures with pocket gophers must be inside their tunnels because they don’t come above ground very often,” she explains.
“The best way to identify pocket gophers is by their crescent or horseshoe-shaped mounds. As they dig burrows they push the soil above ground and create many mounds in that area of the pasture,” says Baker. These mounds may be 12 to 18 inches wide and 4 to 6 inches high. Gophers can create several mounds in one day and a single burrow system may cover 200 to 2000 square feet.
Control Strategies
Control methods include underground traps, baits underground, and fumigation. “Several methods can be effective, depending on how bad the infestation is. With a large infestation in a pasture or field you may even consider plowing that field. This will destroy the burrows and mounds and force the rodents to come above ground, vulnerable to predators,” says Baker.
“One way to get rid of burrowing rodents is crop rotation. Gophers love to burrow in alfalfa because they feed on the large taproots underground. If you have a serious infestation in an alfalfa field you could plow it out and plant an annual grain like oats. Gophers don’t like the shallow roots of small grain crops,” she says.
In a horse pasture, trapping or baiting may be a more feasible option, depending on the infestation. “Trapping is not legal in some states. Check on the laws in your own state. There are several different kinds of traps that work, including cinch traps (that grasp the animal mid body), and box traps of different types and brands,” says Baker.
Traps can be set in the main tunnel or any of the lateral tunnels. “Gophers may not revisit lateral tunnels, however, so trapping may be more successful in the main burrow. Once you locate fresh soil mounds, find the plug side of the mound and insert a stick or probe to find the lateral tunnel. Then dig the tunnel out with a shovel or your hand, following the lateral tunnel until you reach the main tunnel,” she says.
Traps can be placed in the main tunnel in pairs, facing opposite directions. Farm supply stores sell a variety of traps, which can be set according to the manufacturer’s directions. Traps should be anchored to stakes with wire, to keep the gophers from moving them deeper into the burrow system and to keep predators from taking off with the gopher and trap.
Trapping is easy but time consuming. It can be very effective if a person has the time to do it. “When I was a kid my dad used to pay me $1 per gopher so I trapped a lot of gophers, and that’s how I paid for my basketball shoes,” Baker says.
“There are different baits—that come in grain or pelleted form–but you need to find out which ones are legal in your state. The most common types of toxic baits contain strychnine. The main restriction on these is that they can’t be used above ground. They have to be placed down into the burrows. Strychnine is very effective for gophers but it accumulates in the body tissues. If some other animal eats a gopher that was poisoned with strychnine, death may occur. You might not want to use strychnine in an area where there are pets,” she says.
“Another legal poison is zinc phosphide, but it is a restricted use pesticide. You must have an applicator’s license to purchase and use it—which means learning how to handle it, taking a test, and becoming certified (check with your state for regulations/use). There are some zinc phosphide products available over the counter, if the concentration is 2% or less, but they are only sold in quantities of one pound or less. You can find these at many home and garden stores,” she says.
Most baits are in pellet form that can be put in the burrow. “The main thing with zinc phosphide pellets is to not use them when you are expecting rain. Moisture will cause the product to form a phosphine gas, making it ineffective,” says Baker.
“Some baits contain anticoagulants (similar to mice and rat poisons) but are not as effective as strychnine or zinc phosphide. Because of their lower toxicity, however, they sometimes are a better choice in situations where there are pets or other animals that might dig up and eat the dead gopher. Most of these products are multiple-feed baits and require more bait per application than single-feed baits like strychnine. There are various product names, like Kaput, Rozol, etc. and you can buy these over the counter.”
There are various types of probes that can be used to put bait into the burrows. “You can buy these at a home and garden store, but most extension offices have probes that can be loaned or rented to people,” she says. With these you put the bait in a small container attached to the probe, and once you get the probe into the main tunnel you open the container and it drops the bait into the hole. To locate the main tunnel, probe about 8 to 12 inches from the gopher mound, poking the probe down into the ground about 4 inches. When the probe is over the main tunnel it will readily drop about 2 more inches. Then you can dispense to correct amount of bait into the tunnel and close the hole after you remove the probe.
“If it’s just a small infestation, trapping is probably the most effective and cheapest method, compared to buying bait. Fumigation and combustion are other ways to get rid of burrowing rodents but a person has to know what they are doing to use these, because they can be dangerous otherwise,” says Baker.
If it’s a large infestation and a pasture is riddled with old tunnels and dotted with holes or mounds, you may have to disk it up and reseed it. “It’s important to level any gopher mounds, because then if you see fresh mounds you know you still have some gophers left. As a kid trapping gophers I always knocked over the mounds and then if I saw new ones pop up I’d know where to put my traps. And if there’s no new activity you know you got them all or they’ve moved somewhere else,” she explains. Gophers don’t hibernate and are active year round.
“The important thing when you start seeing rodent activity or mounds is to control them early. Once the population gets going, it becomes more difficult to eradicate them all. Pocket gophers breed in the spring and can have 1 or 2 litters per year, averaging 3 to 6 babies per litter. They can produce a lot of young ones in a year and quickly get out of hand and seriously damage a pasture,” says Baker.
Matt Brechwald operates a gopher control service based in Kuna, Idaho. Farmers often hire him to get rid of problem rodents in their fields. “The person you hire to eliminate these animals may use several different methods. The one I use is carbon monoxide injection into their holes, to kill them, and I utilize a piece of equipment called a PERC (pressurized exhaust rodent control) to get rid of gophers, voles and ground squirrels. There are other products available you can purchase or that a hired operator might use. One is called a Rodenator and another is called a Verminator. These put a combination of propane and oxygen into the tunnel. Then this is ignited, which creates an explosion that is supposed to kill the rodents with the concussion, and cave in the tunnel—to prevent re-infestation,” he says.
“Another method farmers sometimes use is an implement pulled behind a tractor, making a tunnel and dropping bait in that tunnel. As gophers are burrowing, they come across that tunnel and explore it, and eat the bait. A person can put poison bait into a field and cover a wide area in less time. I prefer my method, using carbon monoxide under pressure rather than poison,” says Brechwald.
Poisons
“The best poison available for gophers or voles is aluminum phosphide. It comes in pellet form and you drop it into the tunnel and get it a little wet. This triggers a chemical reaction that produces fumes. This gas is extremely lethal and works very well for killing rodents, but you need to have an applicator’s license to legally use it.” You must learn about the proper way to handle this chemical, and take a test to become certified to use restricted products like this one.
“Aluminum phosphide works really well, but there have been a few human fatalities, including two children in a house near Salt Lake City, Utah. The gas came up through a crack in the foundation. Now it can only be used for agricultural purposes by someone with an applicator’s license—with the education and authority to use it. Even for agricultural purposes it can’t be used within a certain distance from a residential structure,” he explains.
“Poisons that you can buy over the counter generally contain some form of cyanide in a bait. One problem with these products is that in recent years the EPA has cut down the level of active ingredients that can be used in over-the-counter baits by about 50%. They are not as lethal as they used to be and not as effective. If gophers or ground squirrels sample this bait and don’t consume enough to kill them, it just makes them sick for a while—and they won’t eat any more of that bait. They won’t touch it again,” he says.
Ground squirrels and voles leave their tunnels open, whereas gophers plug their holes. “There are restrictions in various parts of the country on using poison bait for ground squirrels because other animals, such as burrowing owls, may go into those holes and eat the bait,” he explains. Read labels on poison baits; there may be different provisions for ground squirrels, due to concerns about surface animals eating the bait.
“Sometimes there are residual poisonings of other animals when baits are used. People have treated pastures for ground squirrels or gophers and then their dogs find the dead animals and get sick after eating them,” says Brechwald.
“Poisons can be an easy way to deal with gophers because you can buy a probe to put down through into a tunnel and drop the bait. There are drawbacks, however, in that today they are often not as effective as in the past (lower levels of poison) and carry a risk for poisoning other animals, or residual poisoning,” he says.
Traps
To trap gophers we dig out the tunnel and insert the trap into the tunnel, or a box trap at the end of the tunnel that catches the animal as it comes out,” says Brechwald.
The positive aspect of using traps is that you know when you’ve captured the animal, because you find the body, or the animal in the box trap. “Depending on the time of year, this may mean that you have the culprit from that tunnel. But if it’s during the breeding season there may be more gophers in there, and the trap will only get one at a time,” he says.
Ignited Propane
“The way this works is that concussion from the explosion will kill the animal and cave in the tunnel. Gophers are very territorial but if they are digging along and break into a tunnel system that is already there, they will explore that system if they are not challenged by the original dweller,” says Brechwald.
“It therefore helps to cave in the tunnels, so other ground squirrels won’t move int. I didn’t choose to use this method because of some of the drawbacks. It looked like a person would have to work a lot slower, to get the right combination of propane and oxygen in the tunnel and then set it off,” he says.
Another drawback is the noise. “I was a police officer in Boise for 12 years and we got a lot of calls in the spring from people in the foothills around Boise whenever someone was igniting these. The neighbors were calling the police, thinking someone was shooting a gun or setting off explosives,” he says.
“There are also issues with fire danger, especially in the West where everything can be so dry by July. We worry about sparks from the explosion setting fires in dry weeds, hay stacks, etc. For me, the benefits of this machine were outweighed by the potential negatives,” he says.
Smoke Bombs
These can often be purchased at a farm store. “A disadvantage to these is that you have to open up the tunnel system, light the smoke bomb, get it down into the tunnel, then seal the tunnel again. There are lower levels of success with these than when using a pressure system,” says Brechwald. “There’s also some risk for fire danger in a weedy patch when everything is dry,” he says.
Injecting Carbon Monoxide
“The machine I use has a 14-horsepower motor mounted on it, along with an air compressor powered by that motor. All the exhaust from the motor goes through the cooling coil that goes into the air compressor, where the carbon monoxide gets cooled, concentrated and goes into a pressure tank. When I go out to a group of gopher mounds, I insert a probe into the tunnel to inject carbon monoxide,” says Brechwald.
He feels this the most humane way to kill the animals. With a propane explosion the animal gets burned as it is killed. The gut-clench trap kills them fairly quickly but they suffer for a few moments as they die. With cooled gas going into the tunnels, they don’t feel anything.
“I probe into the mound, and once I get inside the tunnel with the probe I turn on the gas. There are a couple holes in the tip of the probe. I open a valve and the carbon monoxide goes through those into the tunnel at very high pressure/concentration. With gophers we don’t have to seal off any other openings because they block off their own tunnels,” he says.
Often if gophers smell something coming into their tunnel, they push dirt up and block the tunnel, effectively shielding themselves from the gas—and wall themselves off. “They can smell through the dirt, so they just wait until the gas goes away, and then open it up again,” he says.
This is why some types of fumigants are not very effective, or even the carbon monoxide a person might direct down their tunnel with a hose from vehicle exhaust. “Some people think carbon monoxide doesn’t work because someone tried it with a hose connected to a tail pipe of a car and it wasn’t successful,” says Brechwald.
“With the PERC method, however, carbon monoxide is coming in at such high pressure that the gophers are unable to wall themselves off quickly enough. They are overwhelmed almost immediately. Also there is so much pressure that if they try to push dirt up, this just blows the dirt block out,” he explains.
“There are many tools you can buy, to hook up a hose to the tail pipe of a car or a lawn mower, but you don’t have the advantage of pressure. Also, you have to open up the tunnel to stick the hose into it, which also creates a way for gas to escape. The key to the PERC is not the carbon monoxide, but the way it is applied,” he explains.
“We use the PERC on ground squirrels as well as gophers. I’ve done jobs where I didn’t plug the holes; I just run the gas through them. The ground squirrels seem more susceptible to carbon monoxide than gophers, so even if there is gas escaping on the other end we can still exterminate the ground squirrels.” With gophers it’s best to have no openings for the gas to leak out.
Preparing The Ground
Usually the area where there’s been a colony of gophers, ground squirrels, etc. is riddled with mounds and holes. “Once you get rid of the animals you can go over it with a disc or harrow to smooth it out, but there’s an advantage to smoothing it first. If I go to a farm or pasture on a dry piece of ground that is really infested, I recommend working that piece of ground before I treat it. I come back 4 or 5 days later, and the gophers or ground squirrels will be popping up—opening up their holes again. Where there’s any new activity, I’ll know exactly where they are. Unless it’s in a really nice pasture a person wouldn’t want to disk, this makes it easier to get them.”

 The 30/30 Program recommends the use of Altosid® IGR to control fly populations. Producers should start including these products in their feed or supplement early in the spring, 30 days before flies begin to appear through 30 days after the first frost when cold weather reduces or ends fly activity. This time frame ensures an ideal window of treatment with the products, protecting against an unpredictably early or late start to the spring or winter seasons.