What Do Stocker and Cow-Calf Producers Think of Virtual Fencing?
By Thomas Aquino UNL Animal Science Graduate Research Associate. Yijie Xiong, NE Extension Specialist, Precision Livestock Management
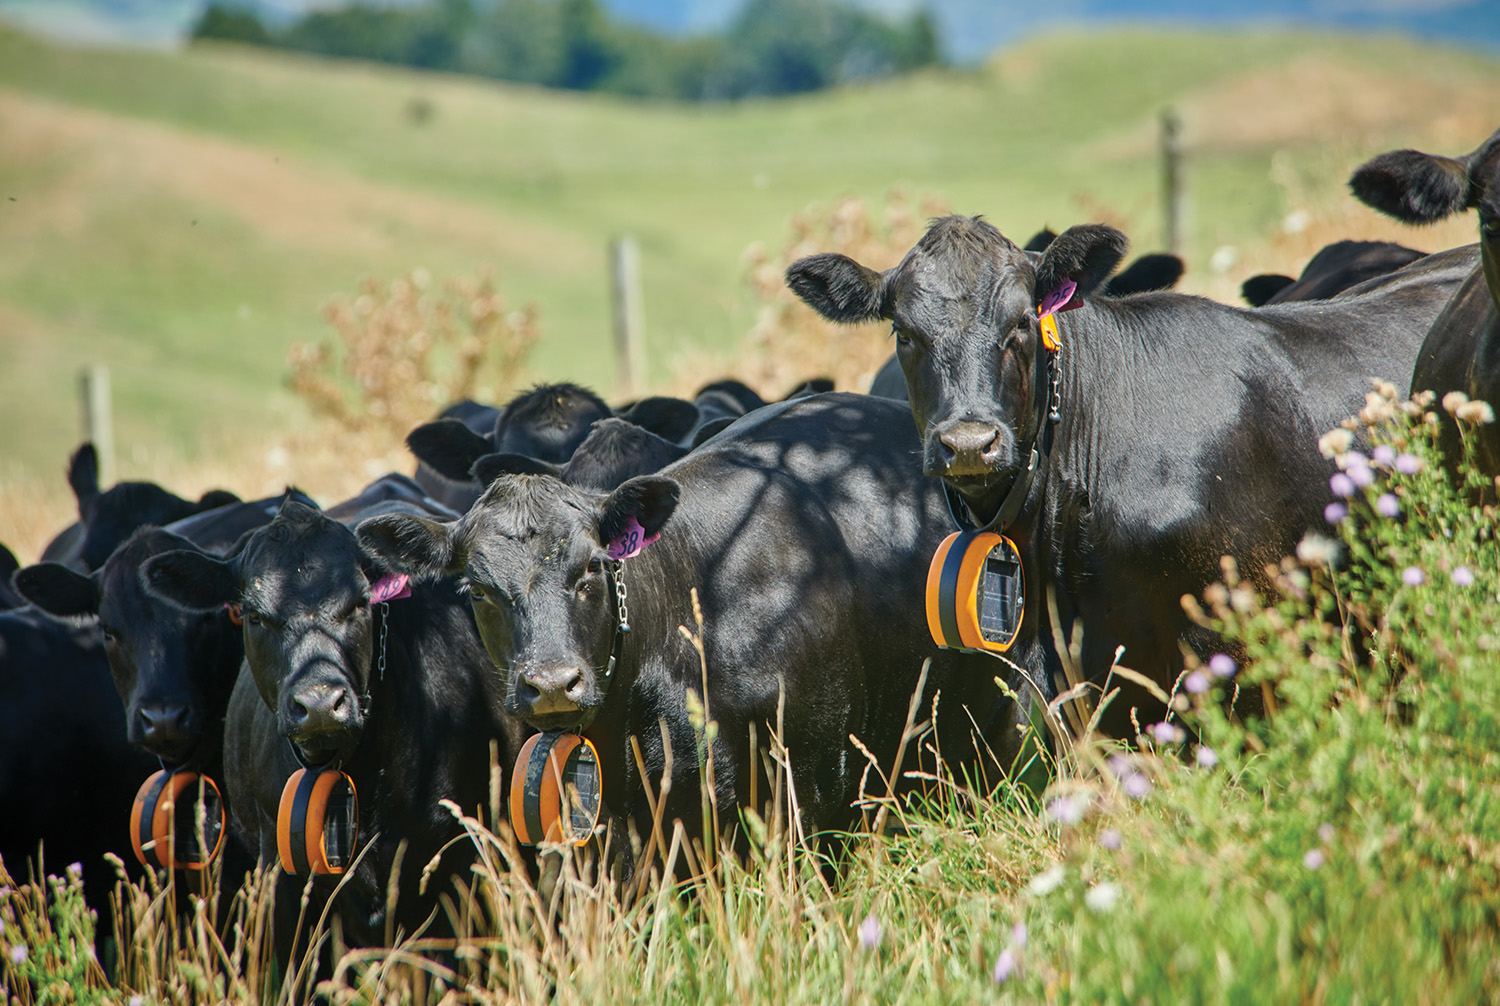
Producers that attended the Nebraska Grazing Conference (NGC) August 8-9, in Kearny, NE. may have noticed a difference from previous proceedings. This year “TechCorner” was added to the exhibition, highlighting new and emerging products in precision livestock management (PLM) such as virtual fencing, data management software and smart water monitoring. In addition to PLM exhibitors, Wednesday morning’s programs were focused primarily on precision grazing management, of which the virtual fencing (VF) technologies were spotlighted in presentations and panelist discussion. Panelists and speakers included UNL extension specialists and representatives from various VF companies. The PLM session gave conference attendees insight into the current applications of VF technology and a glimpse into what the future might hold.
What do stocker and cow-calf producers think of the VF technology?
To answer this question, two graduate students at the conference conducted an intercept survey from the attendees to gather information regarding their perceptions of VF. Intercept surveys consist of open-ended questions asked in a casual interview format. There were six completely anonymous questions designed specifically for stockers and cow-calf producers/ranchers. Interviewees were randomly “intercepted” during break, in the hallway or the exhibition area, from whom full consents were obtained for this survey effort. 14 Survey respondents came from across the state and represented primarily stocker and cow/calf operations. All participants responded fully to each of the questions. Responses were used to gain insight into producer perceptions and attitudes regarding the application and efficacy of current virtual fencing technologies.
The following is a list of questions and a brief summary of common responses (and a few interesting ideas to consider):
Are you familiar with VF technology?
All participants were familiar with VF in some way or another. While none of the respondents had first-hand experience using VF, all knew what it was and had a basic understanding of how it worked. As adoption of this technology continues to expand, familiarity and knowledge of VF will grow amongst users and the general public.
What benefits can VF offer producers?
Most of us understand the research potential that VF can provide, but in producers’ minds, better range management and forage utilization were the most common response. The ability to allocate cattle without the constraints of existing interior fence lines seemed to be the largest perceived benefit. Several producers also expressed interest in creating “exclusion zones” in areas they did not want cattle without needing to build more fences, which is completely doable using VF.
What concerns do you have about using VF?
Unsurprisingly, cost and reliability were the two major concerns across all respondents. Battery life was also a concern. Stocker producers were also worried about the collars “shrinking” over the course of the grazing season as calves grew.
A few of these concerns/questions were mentioned in our previous BeefWatch articles on VF topics, and we highly recommend you check these two articles to answer these questions 1) Technical Note: Where are my cattle at? Part II: Virtual Fencing and 2) Virtual fencing: a new frontier for grazing management. To bring you up to speed, we are providing brief feedback for each of the common concerns mentioned above.
1. What does it cost to have a virtual fence package and how reliable is it?
As we summarized in Technical Note: Where are my cattle at? Part II: Virtual Fencing, the cost of virtual fence products depends on a few factors such as the manufacturer, local cellular/network service availability, battery source, etc. Currently, only a couple of companies provide virtual fencing products, and the sales mode and unit/package prices may vary (although there are some similarities). Usually, virtual fencing is sold as a package, which includes the collar units, base tower unit, signal booster(s)/extender(s), software kit (could be a one-time fee, or more commonly, a monthly subscription fee), and installation. A maintenance fee is also possible, based on the producers’ specific needs. Some manufacturers rent collars (ranging between $100 to $120 per collar) instead of selling them directly and provide product protection/replacement service, just as you would expect from your smart phone’s care program. In addition to these base costs, a fee to cover the connectivity (either via major cellular or local internet providers) is likely needed. Most of the VF units are built using IP67 materials and are weather and light-wear proof.
2. What is the average battery life of virtual fence collars?
The battery life of the collars can impact the efficiency and duration of virtual fencing. There are two major battery sources used in VF units – lithium battery or solar. Both are replaceable or rechargeable. In general, if you need to monitor the herd every 30-60 mins, commercially available lithium batteries could support the collars for at least one to two months while solar batteries have the potential to last longer with reliable exposure to solar. As a rule of thumb, a greater GPS locating/sound alarming/electric shocking frequency leads to less battery longevity. And of course, the size of the pasture one needs to monitor plays a significant role in battery life. More information on these topics can be found in our BeefWatch article Part I: GPS sensors.
3. What about Collar durability?
This is a very important and practical concern. Unfortunately, most VF manufacturers do not include the collars themselves as part of the package (although, most of them have recommended collars or as an add-on accessories). Based on our experience, many of these collars were designed for herding dogs and thus, not practical for cattle use. This leads to the users to explore and identify collars that can withstand weather or cattle activities. We have tried utility belts for human workers, which were affordable but do not last long; and customized leather collars for cattle that have superb durability but are less affordable. We are still exploring good collar candidates. If you have good suggestions, please reach out.
What additional research would you like to see with VF?
The creative minds of survey participants led to an impressive list of potential research questions, however, a few stood out. Several participants noted the lack of information on using VF in crop reside grazing and wondered if that was a viable option. Additionally, producers were interested in some cost/benefit analysis to determine the cost effectiveness of VF. This can vary greatly from one operation to the next and is largely dependent on the value individuals place on labor and equipment cost associated with grazing management and cattle rotation. One respondent was also curious about the possibility of cost sharing if VF infrastructure worked between producers in the same area.
How would/do you utilize VF on your operation?
While no respondents had first-hand experience using VF, there was no shortage of ideas for application of VF. Smaller pasture size and more frequent rotations were the most common response. Respondents were most interested in more effectively utilizing pasture without creating additional cross fencing. One producer showed interest in using previously unfenced areas. It is important to remember just like traditional fencing, there are individuals who will test the virtual boundary and “breakout” therefore, it is advisable to only use virtual fence in areas with a sound perimeter fence.
Is labor an issue when considering grazing management?
10 out of 10 ranchers would probably agree that labor is always an issue, and this group was no different. Most respondents agreed that labor, or the lack thereof, was a consideration when looking at grazing management plans. All but one respondent also agreed that utilizing VF would alleviate some of the labor considerations associated with rotational grazing.
Special thanks are due to those who participated in this survey and conference panelists and speakers for sharing their insight. PLM technologies such as VF are rapidly becoming commonplace on the ranch, creating a need for additional research and extension programming in this new area to serve the industry’s needs. The information gathered from this intercept survey is useful in understanding producer perceptions and can serve as a roadmap for guiding future research. As virtual fencing technology continues to enter the marketplace, it is important to provide the Nebraska beef industry with timely and relevant information regarding its application.